Thursday, April 3, 2014
the Deodorant Saga
I have finally returned to my deodorant blog to get quantities because i require more and i realized that it's been almost 2 years since i made the first batch! i am pretty frugal with my things that i like i have been using store bought as well to make it last a bit longer and i lost a bar for a while but 2 years! thats crazy. sadly i used a fragrance oil that i can no longer find and i will have to make due with my new supply but i am excited. i did make several things with the ingredients i had for the first batch so i had to supplement some of my things. i made two more batches of deodorant, some lipsticks and a few lotions. i also found cocoa butter at walmart for under $5 and shea butter from a local "hippy" store for $7. so my costs of initial creation is going down. i also found that i prefer to use old deodorant containers to keep it in, it's easier to apply and it's not just a mysterious white circle in the fridge easily mistakable for cheese (bad times). using my own deodorant has decreased the darkness under my arms and using a rare exfoliating routine has helped too. but the lotions and moisturizing has helped so much in keeping my under pits so much happier. i break out less and i feel comfortable shaving more often. so happy times. :D

Saturday, November 2, 2013
I voted for this post-apocalyptic "Radioactive" cover to win Response of...
http://www.youtube.com/v/NydXD742t4E?version=3&autohide=1&autohide=1&feature=share&autoplay=1&showinfo=1&attribution_tag=0DFJc1iBH_xSHqCghF5ldA
Monday, October 21, 2013
gem
equired Tools:
A Gemstone (depending on your purpose, such as Rose Quartz for self-love, Amethyst for psychic awareness, etc)
An empty jar (glass preferred, do not use metal as it will interfere with the vibrations)
Clean water, preferably distilled
A large, clear bowl
Distilled vinegar or Vodka (Optional)
If using a crystal that will dissolve in water, or a crystal that may contain toxic elements, you will also need:
A smaller, clear bowl that fits in the larger one.
Directions:
There are two ways to create a Gem Elixir, the Direct Method and the Indirect Method.
The Direct Method involves submerging your crystals in water.
You would use the Indirect Method if:
1. You are using a crystal that will dissolve in water (such as Selenite, Kunzite, Malachite, Halite, Azurite, etc. As a general rule, almost any crystal that ends with -ite will dissolve in water. If you are not sure, do a simple Google search on your crystal. All quartz crystals, such as Amethyst, Citrine, Rose Quartz, etc, are usually water safe), or
2. You are using a crystal that may contain toxic trace elements (for example, Cinnabar contains mercury, Emerald contains aluminium, etc). See the page on Toxic Crystals and Minerals for a more extensive list.
Always do proper research on your crystal before you ingest any type of gem elixir
Directions for the Direct Method:
1. Physically and Spiritually cleanse your stones.
2. Place your crystal(s) in a large, clear bowl and fill with water.
3. Leave the bowl out in the sunlight for 2-4 hours to allow the water to charge with the properties of the stone. If you have a stone that will fade in the sunlight, like Amethyst, you can use the Full Moon's light instead. If using moonlight, leave the bowl out for 12 hours and retrieve the bowl before dawn.
4. Pour the bowl's contents into a clean glass jar. If you are making an elixir that will not be used within a few days to a week, fill your jar only 3/4 full with your elixir and the other 1/4 with either distilled vinegar or vodka, which will act as a preservative and will prevent algae from growing in the water.
5. The contents of this jar is your Mother Essence. You can make smaller dosage bottles by adding about thirteen drops of Mother Essence to a smaller bottle filled with regular water. If the smaller bottle will not be used within a week, add vinegar or vodka to preserve it.
Directions for the Indirect Method:
Follow all of the steps of the Direct Method, except for step 2.
Instead of placing your stones in the large bowl, place them in a smaller bowl. Place the smaller bowl into the larger one, then pour the water into the large bowl.
This way the crystals vibrations can still be applied to the water without transferring toxins and without damaging the crystal.
Using Gem Elixirs:
You can use your elixir to anoint yourself and/or ritual tools.
You can also use it as an oral supplement for healing or drawing energy. If taking orally, only use about 4-5 drops of the Mother Essence by placing the drops on your tongue.
Shelf Life:
If you are taking the elixir internally, it will have a shelf life of about 2 years (with a preservative).
If for Topical application (anointing, cleansing, baths, etc) it will have a shelf life of about 6-10 years (with preservative).
Note: You can also make gem oils in this way. Use oil instead of water and do not add alcohol. This oil can be used for anointing the self, candles, baths, or just for a perfume. You should not ingest these oils and discard them if they begin to smell rancid
A Gemstone (depending on your purpose, such as Rose Quartz for self-love, Amethyst for psychic awareness, etc)
An empty jar (glass preferred, do not use metal as it will interfere with the vibrations)
Clean water, preferably distilled
A large, clear bowl
Distilled vinegar or Vodka (Optional)
If using a crystal that will dissolve in water, or a crystal that may contain toxic elements, you will also need:
A smaller, clear bowl that fits in the larger one.
Directions:
There are two ways to create a Gem Elixir, the Direct Method and the Indirect Method.
The Direct Method involves submerging your crystals in water.
You would use the Indirect Method if:
1. You are using a crystal that will dissolve in water (such as Selenite, Kunzite, Malachite, Halite, Azurite, etc. As a general rule, almost any crystal that ends with -ite will dissolve in water. If you are not sure, do a simple Google search on your crystal. All quartz crystals, such as Amethyst, Citrine, Rose Quartz, etc, are usually water safe), or
2. You are using a crystal that may contain toxic trace elements (for example, Cinnabar contains mercury, Emerald contains aluminium, etc). See the page on Toxic Crystals and Minerals for a more extensive list.
Always do proper research on your crystal before you ingest any type of gem elixir
Directions for the Direct Method:
1. Physically and Spiritually cleanse your stones.
2. Place your crystal(s) in a large, clear bowl and fill with water.
3. Leave the bowl out in the sunlight for 2-4 hours to allow the water to charge with the properties of the stone. If you have a stone that will fade in the sunlight, like Amethyst, you can use the Full Moon's light instead. If using moonlight, leave the bowl out for 12 hours and retrieve the bowl before dawn.
4. Pour the bowl's contents into a clean glass jar. If you are making an elixir that will not be used within a few days to a week, fill your jar only 3/4 full with your elixir and the other 1/4 with either distilled vinegar or vodka, which will act as a preservative and will prevent algae from growing in the water.
5. The contents of this jar is your Mother Essence. You can make smaller dosage bottles by adding about thirteen drops of Mother Essence to a smaller bottle filled with regular water. If the smaller bottle will not be used within a week, add vinegar or vodka to preserve it.
Directions for the Indirect Method:
Follow all of the steps of the Direct Method, except for step 2.
Instead of placing your stones in the large bowl, place them in a smaller bowl. Place the smaller bowl into the larger one, then pour the water into the large bowl.
This way the crystals vibrations can still be applied to the water without transferring toxins and without damaging the crystal.
Using Gem Elixirs:
You can use your elixir to anoint yourself and/or ritual tools.
You can also use it as an oral supplement for healing or drawing energy. If taking orally, only use about 4-5 drops of the Mother Essence by placing the drops on your tongue.
Shelf Life:
If you are taking the elixir internally, it will have a shelf life of about 2 years (with a preservative).
If for Topical application (anointing, cleansing, baths, etc) it will have a shelf life of about 6-10 years (with preservative).
Note: You can also make gem oils in this way. Use oil instead of water and do not add alcohol. This oil can be used for anointing the self, candles, baths, or just for a perfume. You should not ingest these oils and discard them if they begin to smell rancid
stuff
Who Knew???
THINGS YOUR MOTHER SHOULD HAVE TOLD YOU
1. Take your bananas apart when you get home from the store. If you leave them connected at the stem,
they ripen faster.
2. Store your opened chunks of cheese in aluminum foil. It will stay
fresh much longer and not mold!
3. Peppers with 3 bumps on the bottom are sweeter and better for eating.
Peppers with 4 bumps on the bottom are firmer and better for cooking.
4. Add a teaspoon of water when frying ground beef. It will help pull
the grease away from the meat while cooking.
5. To really make scrambled eggs or omelets rich add a couple of
spoonfuls of sour cream, cream cheese, or heavy cream in and then beat
them up.
6. For a cool brownie treat, make brownies as directed. Melt Andes mints
in double broiler and pour over warm brownies. Let set for a wonderful
minty frosting.
7. Add garlic immediately to a recipe if you want a light taste of
garlic and at the end of the recipe if your want a stronger taste of
garlic.
8. Leftover snickers bars from Halloween make a delicious dessert.
Simply chop them up with the food chopper. Peel, core and slice a few
apples. Place them in a baking dish and sprinkle the chopped candy bars
over the apples. Bake at 350 for 15 minutes!!! Serve alone or with
vanilla ice cream. Yummm!
9. Reheat Pizza
Heat up leftover pizza in a nonstick skillet on top of the stove, set
heat to med-low and heat till warm. This keeps the crust crispy. No
soggy micro pizza. I saw this on the cooking channel and it really
works.
10. Easy Deviled Eggs
Put cooked egg yolks in a zip lock bag. Seal, mash till they are all
broken up. Add remainder of ingredients, reseal, keep mashing it up
mixing thoroughly, cut the tip of the baggy, squeeze mixture into egg.
Just throw bag away when done easy clean up.
11. Expanding Frosting
When you buy a container of cake frosting from the store, whip it with
your mixer for a few minutes. You can double it in size. You get to
frost more cake/cupcakes with the same amount. You also eat less sugar
and calories per serving.
12. Reheating refrigerated bread
To warm biscuits, pancakes, or muffins that were refrigerated, place
them in a microwave with a cup of water. The increased moisture will
keep the food moist and help it reheat faster.
13. Newspaper weeds away
Start putting in your plants, work the nutrients in your soil. Wet
newspapers, put layers around the plants overlapping as you go. Cover
with mulch and forget about weeds. Weeds will get through some gardening
plastic they will not get through wet newspapers.
14. Broken Glass
Use a wet cotton ball or Q-tip to pick up the small shards of glass you
can't see easily.
15. No More Mosquitoes
Place a dryer sheet in your pocket. It will keep the mosquitoes away.
16. Squirrel Away!
To keep squirrels from eating your plants, sprinkle your plants with
cayenne pepper. The cayenne pepper doesn't hurt the plant and the
squirrels won't come near it.
17. Flexible vacuum
To get something out of a heat register or under the fridge add an
empty paper towel roll or empty gift wrap roll to your vacuum. It can be
bent or flattened to get in narrow openings.
18. Reducing Static Cling
Pin a small safety pin to the seam of your slip and you will not have a
clingy skirt or dress. Same thing works with slacks that cling when
wearing panty hose. Place pin in seam of slacks and ... guess what! ...
static is gone.
19. Measuring Cups
Before you pour sticky substances into a measuring cup, fill with hot
water. Dump out the hot water, but don't dry cup. Next, add your
ingredient, such as peanut butter, and watch how easily it comes right
out. (Or spray the measuring cup or spoon with Pam before using)
20. Foggy Windshield?
Hate foggy windshields? Buy a chalkboard eraser and keep it in the
glove box of your car When the windows fog, rub with the eraser! Works
better than a cloth!
21. Re-opening envelopes
If you seal an envelope and then realize you forgot to include
something inside, just place your sealed envelope in the freezer for an
hour or two. Viola! It unseals easily.
22. Conditioner
Use your hair conditioner to shave your legs. It's cheaper than shaving
cream and leaves your legs really smooth. It's also a great way to use
up the conditioner you bought but didn't like when you tried it in your
hair.
23. Goodbye Fruit Flies
To get rid of pesky fruit flies, take a small glass, fill it 1/2' with
Apple Cider Vinegar and 2 drops of dish washing liquid; mix well. You
will find those flies drawn to the cup and gone forever!
24. Get Rid of Ants
Put small piles of cornmeal where you see ants. They eat it, take it
'home,' can't digest it so it kills them. It may take a week or so,
especially if it rains, but it works and you don't have the worry about
pets or small children being harmed!
25. Dryer Filter
Even if you are very diligent about cleaning the lint filter in your
dryer it still may be causing you a problem. If you use dryer sheets a
waxy build up could be accumulating on the filter causing your dryer to
over heat. The solution to this is to clean your filter with with a
toothbrush and hot soapy water every 6 months
Sunday, August 18, 2013
copper
The
history, legend and lore of Copper use by humans is long and varied,
dating back nearly 10,000 years with multiple applications. Copper is,
in fact, humanity’s first metal and shows up in Sumerian and Egyptian
metallurgy circa 3900 BC. Copper has
been used for jewelry and in medical treatments since man first
discovered it. In fact we can't live without it; copper is one of those
metallic elements which are essential to human health. And since the
body can't manufacture copper, it must absorb the essential element by
other means. The old wives tale of wearing copper jewelry to reduce the
pain of arthritis is quite valid.
Copper is an excellent energy conductor! It sends and amplifies thoughts, healing energy, and gem electrical energy into the wearer's energy field. Because of this, it encourages the physical/emotional bodies to find alignment. The result is clearer thinking, less aggressive behavior, a more calming persona and a boost to self-esteem. This is a warming stone. Copper helps to release the "excess charge" of resentment and anger. It's mineral make up encourages the balance between warm sun energy and cool lunar energy. It is an excellent assistant for increasing your ability to express and accept your true feelings. Copper will balance your personal energy reserve and confidence. It is also believed that copper has the power to amplify thoughts when sending and receiving psychic communications.
Copper is often known as the "love metal" as it helps us open up to love energies and physically helps with sexual imbalances. The healing properties of this stone are particularly enhanced when used in conjunction with other stones such as hematite and tourmaline.
New Age followers carry copper with their stones and crystals to 'straighten' the properties of them, as well they are used when creating crystal wands to be certain of their clear and straight powers.
Copper has also been found to be beneficial for a disorder called "streetlight phenomenon", when passing under a streetlight the negative energy charge in the body can turn off or shut down the light. Those with this energy charge are called "sliders" and the energy can be referred to as the "slider phenomena". It is common among those with a strong aura. Often people think it is their aura that causes this but it is the negative energy you carry, that reflects this. Your auric light is an expression of your mental, physical and emotional expression. Since energy is so sensitive, it is expressed outwardly sometimes before any symptoms are observed. Copper (along with hematite or magnetic hematite) help this situation.
Copper is also quite instrumental in the physical and mental healing rites of many peoples of this world.
Copper is the third most abundant trace mineral found in the human body. It is transported through our body by proteins in our bloodstream. The human brain and liver contain the largest amounts of copper, with lesser amounts of copper in other organs. We need approximately 3 mg copper per day in our diet. Copper is an essential component of the natural pigment, melanin that gives color to our skin, hair, and eyes. Copper keeps our hair from turning grey and helps keep our hair thick. Required in our body to make enzymes that stop our arteries from hardening, copper is required to support the enzyme lysyl oxidase. Lysyl Oxidase is used in the synthesis and maintenance of bone and connective tissue.
Copper is also essential to the activation of lysyl oxidase and supports both elastin and collagen productions. Copper can be used anywhere on or around the body. It is very effective when used at the Solar Plexus Chakra for issues pertaining to the stomach and intestines. When worn directly on the skin, copper detoxes and soothes arthritis, rheumatism, other inflammation problems.
Copper works for exhaustion recovery and improving circulation due to the fact that it influences the flow of blood. Whenever there is better blood flow, there is better circulation and less pain. Copper, therefore, is important for metabolism, as it stabilizes the metabolism and heightens immune system responses. Copper is also beneficial for the lungs, as it improves the exchange of oxygen and helps in filtering out pollutants. Soft tissue and mucous membranes retain more moisture and become less susceptible to irritation when there is enough copper in the body.
Copper is used in the Center/Health position to encourage good health and create balance and calm. Use copper for dispersing negative energy in any room. Use it in any room to also attract change into your space.
Copper is an excellent energy conductor! It sends and amplifies thoughts, healing energy, and gem electrical energy into the wearer's energy field. Because of this, it encourages the physical/emotional bodies to find alignment. The result is clearer thinking, less aggressive behavior, a more calming persona and a boost to self-esteem. This is a warming stone. Copper helps to release the "excess charge" of resentment and anger. It's mineral make up encourages the balance between warm sun energy and cool lunar energy. It is an excellent assistant for increasing your ability to express and accept your true feelings. Copper will balance your personal energy reserve and confidence. It is also believed that copper has the power to amplify thoughts when sending and receiving psychic communications.
Copper is often known as the "love metal" as it helps us open up to love energies and physically helps with sexual imbalances. The healing properties of this stone are particularly enhanced when used in conjunction with other stones such as hematite and tourmaline.
New Age followers carry copper with their stones and crystals to 'straighten' the properties of them, as well they are used when creating crystal wands to be certain of their clear and straight powers.
Copper has also been found to be beneficial for a disorder called "streetlight phenomenon", when passing under a streetlight the negative energy charge in the body can turn off or shut down the light. Those with this energy charge are called "sliders" and the energy can be referred to as the "slider phenomena". It is common among those with a strong aura. Often people think it is their aura that causes this but it is the negative energy you carry, that reflects this. Your auric light is an expression of your mental, physical and emotional expression. Since energy is so sensitive, it is expressed outwardly sometimes before any symptoms are observed. Copper (along with hematite or magnetic hematite) help this situation.
Copper is also quite instrumental in the physical and mental healing rites of many peoples of this world.
Copper is the third most abundant trace mineral found in the human body. It is transported through our body by proteins in our bloodstream. The human brain and liver contain the largest amounts of copper, with lesser amounts of copper in other organs. We need approximately 3 mg copper per day in our diet. Copper is an essential component of the natural pigment, melanin that gives color to our skin, hair, and eyes. Copper keeps our hair from turning grey and helps keep our hair thick. Required in our body to make enzymes that stop our arteries from hardening, copper is required to support the enzyme lysyl oxidase. Lysyl Oxidase is used in the synthesis and maintenance of bone and connective tissue.
Copper is also essential to the activation of lysyl oxidase and supports both elastin and collagen productions. Copper can be used anywhere on or around the body. It is very effective when used at the Solar Plexus Chakra for issues pertaining to the stomach and intestines. When worn directly on the skin, copper detoxes and soothes arthritis, rheumatism, other inflammation problems.
Copper works for exhaustion recovery and improving circulation due to the fact that it influences the flow of blood. Whenever there is better blood flow, there is better circulation and less pain. Copper, therefore, is important for metabolism, as it stabilizes the metabolism and heightens immune system responses. Copper is also beneficial for the lungs, as it improves the exchange of oxygen and helps in filtering out pollutants. Soft tissue and mucous membranes retain more moisture and become less susceptible to irritation when there is enough copper in the body.
Copper is used in the Center/Health position to encourage good health and create balance and calm. Use copper for dispersing negative energy in any room. Use it in any room to also attract change into your space.
Friday, August 2, 2013
Monday, April 8, 2013
Migraine cure
http://frugallysustainable.com/2012/05/how-to-treat-migraines-with-an-herbal-tincture-at-home-a-recipe/
Lemon balm (Melissa officinalis) abounds in my garden!
It is one of the most easy to grow medicinal herbs and has some pretty amazing healing properties…making it a great addition to the home pharmacy.
Historically, lemon balm has been used to treat all kinds of nervous system ailments and is known for it’s ability to:

Likewise, feverfew is unbeatable when it comes to treating the common headache, migraines, stress/tension headaches, and those headaches associated with PMS symptoms. It truly is a wonder herb and a must in the garden of those who suffer these ailments.
Note: Please see my How to Make a Tincture at Home video for more helpful information regarding making a tincture.
Migraine Tincture ~ A Recipe
Supplies needed
-Solvent (i.e. 100 proof alcohol or vegetable glycerin)
-quart sized glass mason jar
-4 oz. fresh or 2 oz. of dried herbs
Ingredients

-3 parts lemon balm
-2 parts feverfew
-100 proof vodka to fill
Method

1. Measure your herbs depending on whether you are using fresh or dried herbs.
2. If using fresh herbs, chop until fine.
3. Add herbs to glass jar.
4. Pour solvent over herbs to fill the jar. The solvent should rise 1-2 inches above the herbs.
5. Place the lid on the jar and shake until the herbs are well combined.
6. Label jar with contents and date.
7. Set in a warm, sunny window and steep for 2-6 weeks, shaking daily.
8. Strain with a cheesecloth, compost the plant material, and place tincture in dark colored bottles for storage in a cool, dark place. The tincture should keep for up to 5 years.
Adult Dosage
At the sudden onset of migraine symptoms, begin taking 1/4-1/2 a teaspoon of the tincture every 30 minutes to an hour until symptoms subside.
Lemon balm (Melissa officinalis) abounds in my garden!
It is one of the most easy to grow medicinal herbs and has some pretty amazing healing properties…making it a great addition to the home pharmacy.
Historically, lemon balm has been used to treat all kinds of nervous system ailments and is known for it’s ability to:
- calm an irritable child.
- act as an antiviral in treating cold sores due to the herpes virus.
- heal wounds and protect the skin.
- treat the symptoms of the common cold and flu when combined with other medicinal herbs.
- relieve the symptoms of migraine headaches, anxiety, depression, and insomnia.
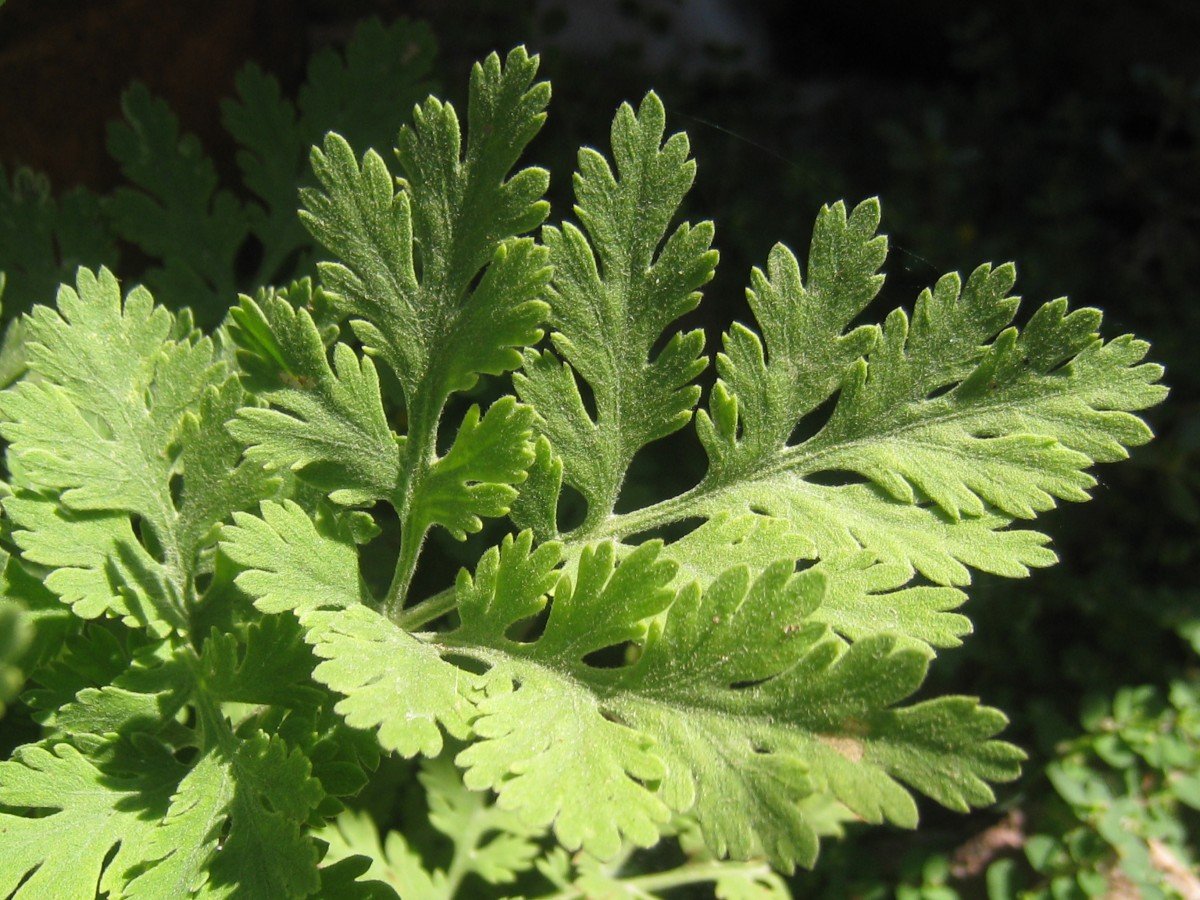
Likewise, feverfew is unbeatable when it comes to treating the common headache, migraines, stress/tension headaches, and those headaches associated with PMS symptoms. It truly is a wonder herb and a must in the garden of those who suffer these ailments.
Note: Please see my How to Make a Tincture at Home video for more helpful information regarding making a tincture.
Migraine Tincture ~ A Recipe
Supplies needed
-Solvent (i.e. 100 proof alcohol or vegetable glycerin)
-quart sized glass mason jar
-4 oz. fresh or 2 oz. of dried herbs
Ingredients
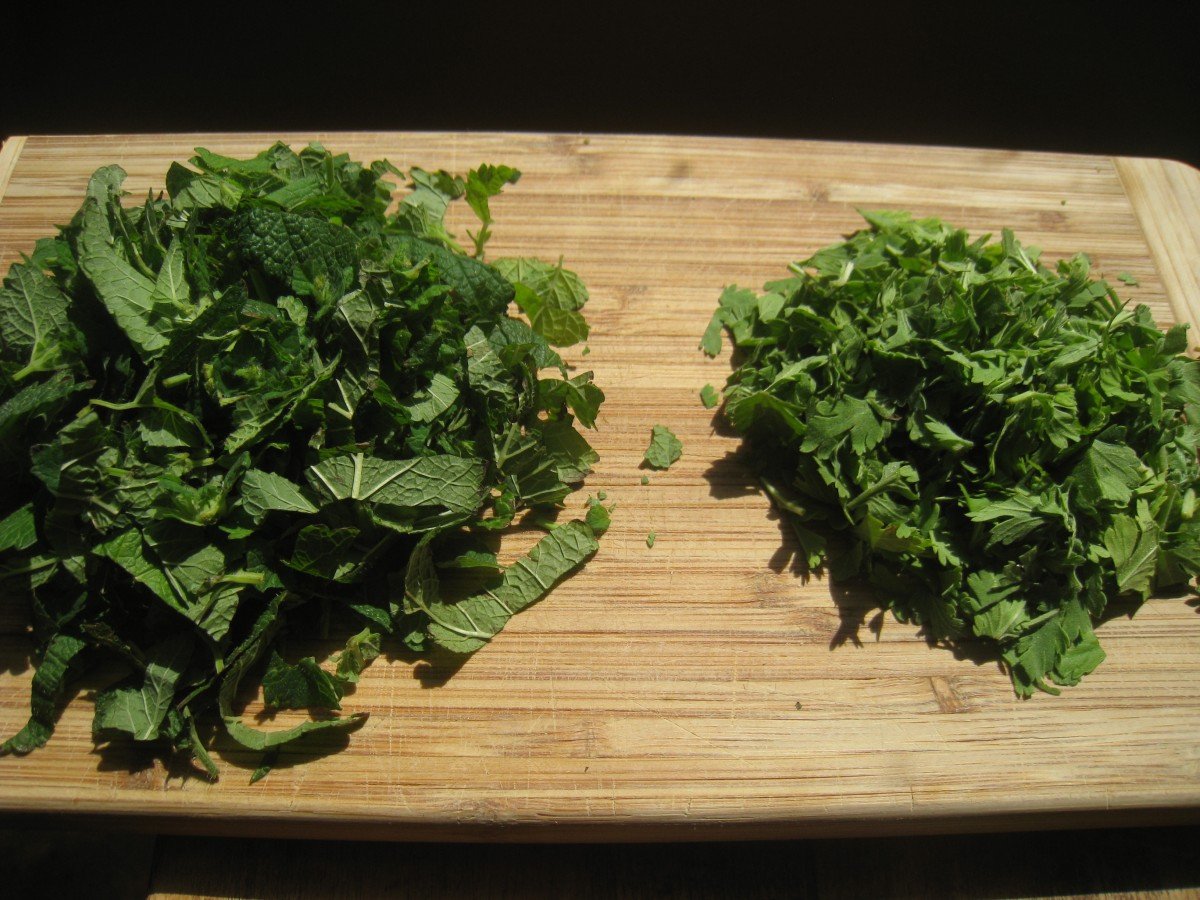
-3 parts lemon balm
-2 parts feverfew
-100 proof vodka to fill
Method
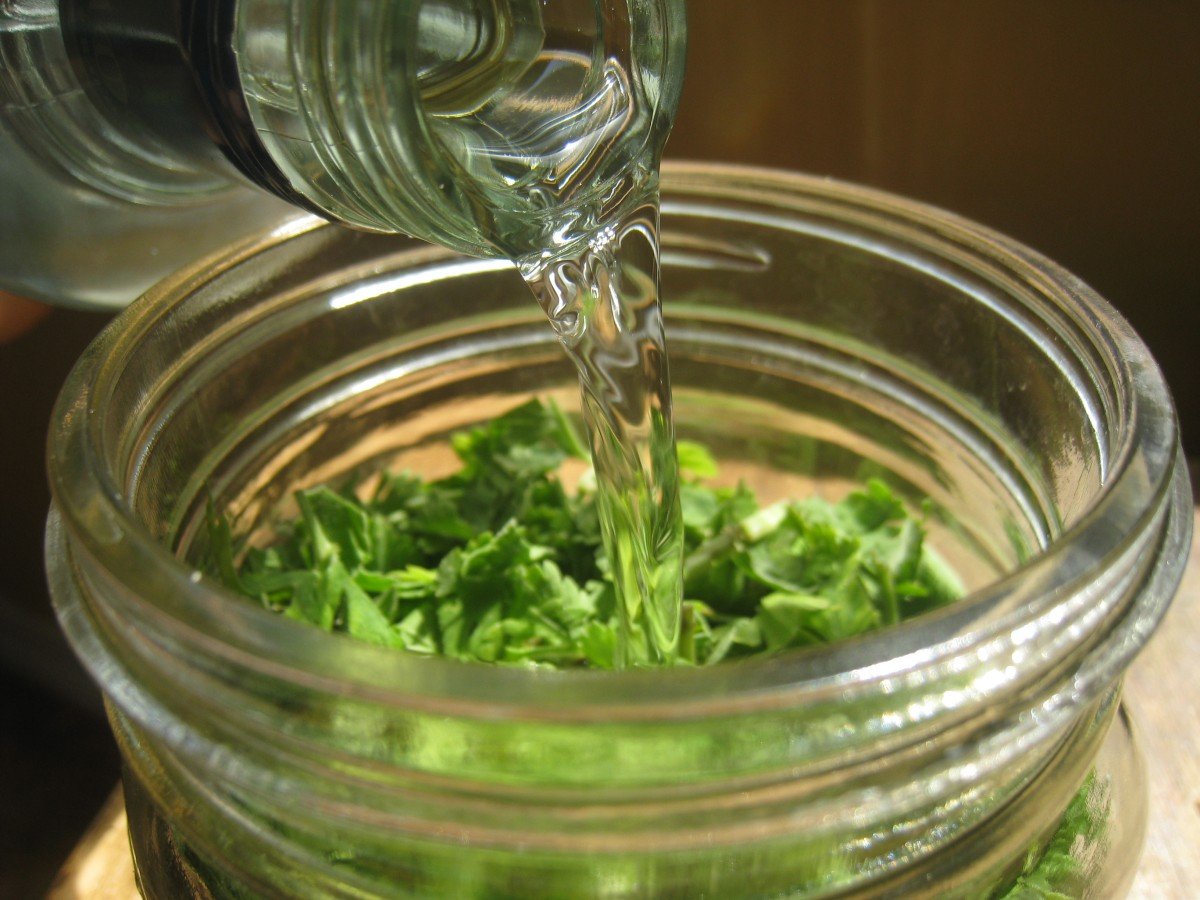
1. Measure your herbs depending on whether you are using fresh or dried herbs.
2. If using fresh herbs, chop until fine.
3. Add herbs to glass jar.
4. Pour solvent over herbs to fill the jar. The solvent should rise 1-2 inches above the herbs.
5. Place the lid on the jar and shake until the herbs are well combined.
6. Label jar with contents and date.
7. Set in a warm, sunny window and steep for 2-6 weeks, shaking daily.
8. Strain with a cheesecloth, compost the plant material, and place tincture in dark colored bottles for storage in a cool, dark place. The tincture should keep for up to 5 years.
Adult Dosage
At the sudden onset of migraine symptoms, begin taking 1/4-1/2 a teaspoon of the tincture every 30 minutes to an hour until symptoms subside.
Natural Remedies for Allergy Relief
found at http://wellnessmama.com/8370/7-natural-remedies-for-allergy-relief/
1. Apple Cider Vinegar
Apple cider vinegar is an age old remedy that is often suggested for a variety of health conditions. I’ve personally used it for allergy relief (and heartburn relief) with great success. The theory is that its ability to reduce mucous production and cleanse the lymphatic system makes it useful for allergies. It is also said to help digestion, weight loss and more so it is worth a try!What I did: I mixed a teaspoon of organic, unfiltered apple cider vinegar with “The Mother” (that part is important) into a glass of water and drank this three times a day. This helped me with relief of acute allergy symptoms and seemed to help prevent allergy attacks as well.
2. Neti Pot and Saline Rinse
I haven’t personally tried the Neti pot because I’m a big scardey cat about pouring things in my nose, but I have friends who swear by it, and I’ve used saline nasal spray before. (If you use one, I’d love to hear your experience in the comments!) The basic theory is that you use a Neti Pot filled with a sterile saline solution to flush out the sinuses of allergens and irritations.Surprisingly, I’ve heard this recommended by conventional and alternatie doctors, and it seems that it doesn’t really have a downside.
To use: Either use a pre-made saline rinse or make your own by dissolving 1 teaspoon of himalayan or sea salt in a quart of boiled distilled water. Cool completely and put in the Neti Pot. Pour through one nostril and let it drain out the other.
3. Quercetin
Quercetin is a natural bioflavonoid that is said to help stabilize mast cells to keep them from releasing histamine. It is also a potent antioxidant that is said to help reduce inflammation. It is best used as a long term remedy and many people start taking it about 4-6 weeks before allergy season to help prevent allergy symptoms.As with any herb, you should check with your doctor before using, especially if you have a liver problem, are pregnant, or are on hormonal contraceptives.
To Use: Though Quercetin is naturally found in foods like citrus and broccoli, it is very difficult to get the amount needed to relive allergies from food alone. A supplemental dose can be helpful for preventing allergies or helping acute symptoms. Not recommended during pregnancy or nursing though some practitioners feel it is safe after the first trimester.
4. Nettle Leaf
Nettle leaf is another natural antihistamine that can be very effective as it naturally blocks the body’s ability to produce histamine. It grows in many places and can be made in to a tincture or tea, but for allergy relief, capsules made from dried nettle leaves are the easiest and most effective option.Nettle leaf can also be used in combination with other herbs to make a soothing herbal tea for allergy relief. It is often mixed with peppermint leaf and sometimes red raspberry leaf to make a refreshing allergy relief tea.
To Use: Either make a tea (recipe at the bottom of this post) or use capsules for acute relief of allergy symptoms.
5.Probiotics
Allergies are the result of an imbalance in the immune system that causes the body to react too strongly to a stimuli. New research links the presence of beneficial bacteria in the gut with reduced incidence of allergies. Evidence is even emerging that a mother’s gut bacteria during pregnancy and nursing can impact a child’s likelihood of getting allergies throughout life.While we can’t do much about our mothers’ diets while they were pregnant, balancing gut bacteria now and consuming enough beneficial bacteria can have a positive effect on allergies now. Fermented foods and drinks like Kombucha or Kefir can hep boost gut bacteria, as can a high quality probiotic capsule.
6. Local Honey
There isn’t much scientific evidence to back this one, but there seems to be a lot of anecdotal evidence from people who have tried it. (Even Mark Sisson weighed in on the subject here). The theory is that consuming local honey from where you live will help your body adapt to the allergens in the environment there. This is supposed to work like a natural allergy “shot” and doesn’t seem to have a downside.To Use: Consume a teaspoon or more of raw, unprocessed local honey from as close to where you actually live as possible. Do this one or more times a day to help relieve symptoms. It is often suggested to start this a month or so before allergy season.
7. Diet Changes
If all else fails, sometimes dietary changes can be the answer to allergy problems. In our own experience, the GAPS diet helped relieve many of the allergy symptoms we experienced, including some rather severe food allergies in one of our children.After our experience, I’d definitely encourage this as an option, especially for severe allergies or those in need of gut healing/rebalancing.
Mosquito Trap

HOMEMADE MOSQUITO TRAP:
Items needed:
200 ml water
50 grams of brown sugar
1 gram of yeast
2-liter plastic bottle
Or US conversion:
1 cup of water
1/4 cup of brown sugar
HOW:
1. Cut the plastic bottle in half.
2. Mix brown sugar with hot water. Let cool. When cold, pour in the bottom half of the bottle.
3. Add the yeast. No need to mix. It creates carbon dioxide, which attracts mosquitoes.
4. Place the funnel part, upside down, into the other half of the bottle, taping them together if desired.
5. Wrap the bottle with something black, leaving the top uncovered, and place it outside in an area away from your normal gathering area. (Mosquitoes are also drawn to the color black.)
I found this on facebook and i'm just posting to keep it in my life.
Monday, March 4, 2013
Happy Legs
Last night I mixed up a batch of the Lemon Sugar scrub (had to go get lemon juice). I choose to go with Coconut Oil so the mixture was more of a thick paste than drippy mess. I'm so glad I did. It came out like an off white icing, still not brave enough to taste it but I could. The consistency was great for gathering with the fingers for spreading on my legs right out of the sandwich Tupperware container. Which it fit perfectly into.
In the shower I lathered the mixture on my legs until the sugar dissolved and everything felt well exfoliated. I probably only used a tablespoon per leg it wasn't a lot. Then came the razor, I had to knock out all the dead skin after each pass. I had no idea there was so much dead skin on my legs because the second time I shaved it was the same deal still! SO GROSS! But I'm glad I got that skin off my legs, now i have bright soft hair free legs. They feel fantastic and no razor burn. I'm wondering if this would work for the underarms as well... maybe next shower.
In the shower I lathered the mixture on my legs until the sugar dissolved and everything felt well exfoliated. I probably only used a tablespoon per leg it wasn't a lot. Then came the razor, I had to knock out all the dead skin after each pass. I had no idea there was so much dead skin on my legs because the second time I shaved it was the same deal still! SO GROSS! But I'm glad I got that skin off my legs, now i have bright soft hair free legs. They feel fantastic and no razor burn. I'm wondering if this would work for the underarms as well... maybe next shower.
Sunday, March 3, 2013
Legs legs and more legs....
Spring is fast approaching... or so we hope as I stare at the depressing snow fall here in upstate NY. As New Yorkers we are notorious for taking the first opportunity the temperature is above freezing to break out our spring clothes and show off a little more skin. I am sure that first glimpse of my legs is going to be a blinding shock of dry unattractive ghost white gams. Thankfully I found this post about a sugar and lemon scrub to freshen up your skin and shave away the little dots of perpetual annoyance. diy skin smoother for silky soft legs is an article by Jilly who does some amazing posts. This sugar scrub is light, healthy and simple.
The Saviors
1 1/4 cup Sugar, granulated
1/2 cup of oil, any is good, coconut, olive, almond even baby oil.
3 tablespoons of a citrus, probably best to use lemon or lime.
and your shaving razor.
I suggest using a plastic jar or bowl for mixing, as glass could break in the bath and make the crew of Psycho wish they had used your adventure for filming.
After a vigorous or even violent mix to get all the culprits working together take it to the shower.
Let your legs get nice and warm and damp with the water. I'm not sure about everyone else but I shower top to bottom so washing my hair and body come before shaving, therefore I have the perfect setup for this treatment already in place with soaked legs.
Next instead of a normal shaving routine use the sugar lemon scrub all over your legs, heck use it on your feet. The sugar is exfoliating your dead skin cells, the oil is saturating that newly exposed layer of skin and the lemon is brightening the appearance of your skin. Next just shave it off. The oil will save you from razor burn so no need to worry.
One final step. Do it again. This will get that extra layer of skin we normally see after shaving that's still not what we expected that old and dry layer that we thought we just got rid of.
If the scrub is feeling sensitive the second time and if it hurts dont shave again but I have a sneaking suspicion it wont happen for most people. If the oils feel like they are still coating your skin too much use a mild soap. And please please please be careful after using oil in your tub, it will be slippery it wont go away until you use soap or a cleanser on the tub!
After your shower use a normal routine, lotion whatever, unless the oils feel good enough for you. I'm lazy I usually forget lotion until bedtime. But this routine should be a breath of fresh air for your dull winter leggies. Please let me know how well it worked for you and any improvements you found.
Happy pampering!
The Saviors
1 1/4 cup Sugar, granulated
1/2 cup of oil, any is good, coconut, olive, almond even baby oil.
3 tablespoons of a citrus, probably best to use lemon or lime.
and your shaving razor.
I suggest using a plastic jar or bowl for mixing, as glass could break in the bath and make the crew of Psycho wish they had used your adventure for filming.
After a vigorous or even violent mix to get all the culprits working together take it to the shower.
Let your legs get nice and warm and damp with the water. I'm not sure about everyone else but I shower top to bottom so washing my hair and body come before shaving, therefore I have the perfect setup for this treatment already in place with soaked legs.
Next instead of a normal shaving routine use the sugar lemon scrub all over your legs, heck use it on your feet. The sugar is exfoliating your dead skin cells, the oil is saturating that newly exposed layer of skin and the lemon is brightening the appearance of your skin. Next just shave it off. The oil will save you from razor burn so no need to worry.
One final step. Do it again. This will get that extra layer of skin we normally see after shaving that's still not what we expected that old and dry layer that we thought we just got rid of.
If the scrub is feeling sensitive the second time and if it hurts dont shave again but I have a sneaking suspicion it wont happen for most people. If the oils feel like they are still coating your skin too much use a mild soap. And please please please be careful after using oil in your tub, it will be slippery it wont go away until you use soap or a cleanser on the tub!
After your shower use a normal routine, lotion whatever, unless the oils feel good enough for you. I'm lazy I usually forget lotion until bedtime. But this routine should be a breath of fresh air for your dull winter leggies. Please let me know how well it worked for you and any improvements you found.
Happy pampering!
Wednesday, February 27, 2013
The radio staggers against the backspace!
The radio staggers against the backspace! brought to you by Payperpost.com :D
my disclosure policy
This policy is valid from 27 February 2013
This blog is a personal blog written and edited by me. For questions about this blog, please contact Kendra Lee (Kendrajumplee@yahoo.com).
This blog accepts forms of cash advertising, sponsorship, paid insertions or other forms of compensation.
The compensation received will never influence the content, topics or posts made in this blog. All advertising is in the form of advertisements generated by a third party ad network. Those advertisements will be identified as paid advertisements.
The owner(s) of this blog is compensated to provide opinion on products, services, websites and various other topics. Even though the owner(s) of this blog receives compensation for our posts or advertisements, we always give our honest opinions, findings, beliefs, or experiences on those topics or products. The views and opinions expressed on this blog are purely the bloggers' own. Any product claim, statistic, quote or other representation about a product or service should be verified with the manufacturer, provider or party in question.
This blog does not contain any content which might present a conflict of interest.
To get your own policy, go to http://www.disclosurepolicy.org
This blog is a personal blog written and edited by me. For questions about this blog, please contact Kendra Lee (Kendrajumplee@yahoo.com).
This blog accepts forms of cash advertising, sponsorship, paid insertions or other forms of compensation.
The compensation received will never influence the content, topics or posts made in this blog. All advertising is in the form of advertisements generated by a third party ad network. Those advertisements will be identified as paid advertisements.
The owner(s) of this blog is compensated to provide opinion on products, services, websites and various other topics. Even though the owner(s) of this blog receives compensation for our posts or advertisements, we always give our honest opinions, findings, beliefs, or experiences on those topics or products. The views and opinions expressed on this blog are purely the bloggers' own. Any product claim, statistic, quote or other representation about a product or service should be verified with the manufacturer, provider or party in question.
This blog does not contain any content which might present a conflict of interest.
To get your own policy, go to http://www.disclosurepolicy.org
Saturday, June 23, 2012
Deodorant month one
So it's been just over a month of solely using my home made deodorant. I have made some changes. I put in some more of the dry ingredients to make it a bit more solid and poured it into an empty travel sized stick container. It's easier to apply obviously however I do end up getting a bit more clumpy and I end up massaging it in to my skin anyway. On the plus side I have no stains when I massage it in properly and my skin is looking healthier. I skipped one day and wore the regular stuff and my skin kinda freaked out and got all itchy. It was probably over dried and unaccustomed to the "old" stuff so haven't "cheated" again. I love the stick it's totally convenient and there aren't any funny looks from friends waiting on me when I am sitting there massaging my pits.
Tonight I am making a batch to take to a friend, hope she likes my taste in essential oils lol.
Tonight I am making a batch to take to a friend, hope she likes my taste in essential oils lol.
Sunday, May 20, 2012
Day one of Deodorant from home
I had some friends over today, some close friends. Before my shower I got a friend to do a sniff test for my homemade deodorant. I had put it on last night, slept a normal night and then broke a sweat cleaning. She didn't even catch a whiff of anything funky. IT WORKS! I also have a feeling that my nightmare of white pit stains on my black shirts and clumpy deodorant pits are behind me. It's a lotion! It sinks into your skin and I daresay it will help improve the skin irritation from shaving too! So far no skin reactions anywhere, under-boob or otherwise. Can you tell I am enthusiastic? I can't wait to update for a week or even a month of happy pits and nostrils.

This is also the completion of week one on the "No Shampoo" experiment. Some would say it's a necessity but I think back to our Native American days where all we has was a lake to bathe in. I found a website with the suggestion of 1 tbs. Baking Soda to 1 cup of water for a "shampoo" concoction. I found it's hard to do, it's quite watery and I prefer more of a paste style created from mixing as little water as possible then using it exactly like shampoo. A bit gritty but so far my dandruff is much decreased and a box of baking soda goes for $.52!
Follow up with... "conditioner" any mix of water and Apple Cider Vinegar that suits your nostrils. I actually like the smell and it will rinse out of your hair with enough time under the faucet. If you want a nice mild proportion to start out with they suggest 2 tbs. per cup of water. I use it like any other rinse, with the bottle of my "ACV conditioner" I pour it directly onto my scalp and hair making sure my hair is wet and cold to make sure it's in there good, it's cheap, I use a lot. Let it set for a min. or two and then rinse for as long as you still smell vinegar. After my hair is all dry it's soft and shiny and clean as a... clean head of hair. hee hee. Just ask I'll let you fluff and molest my hair for proof.
I have some websites a friend mentioned to go through and if there are any suggestions let me be your personal guinea pig.

This is also the completion of week one on the "No Shampoo" experiment. Some would say it's a necessity but I think back to our Native American days where all we has was a lake to bathe in. I found a website with the suggestion of 1 tbs. Baking Soda to 1 cup of water for a "shampoo" concoction. I found it's hard to do, it's quite watery and I prefer more of a paste style created from mixing as little water as possible then using it exactly like shampoo. A bit gritty but so far my dandruff is much decreased and a box of baking soda goes for $.52!
Follow up with... "conditioner" any mix of water and Apple Cider Vinegar that suits your nostrils. I actually like the smell and it will rinse out of your hair with enough time under the faucet. If you want a nice mild proportion to start out with they suggest 2 tbs. per cup of water. I use it like any other rinse, with the bottle of my "ACV conditioner" I pour it directly onto my scalp and hair making sure my hair is wet and cold to make sure it's in there good, it's cheap, I use a lot. Let it set for a min. or two and then rinse for as long as you still smell vinegar. After my hair is all dry it's soft and shiny and clean as a... clean head of hair. hee hee. Just ask I'll let you fluff and molest my hair for proof.
I have some websites a friend mentioned to go through and if there are any suggestions let me be your personal guinea pig.
My beginning to an end
So lately I've been looking at how much money my family spends on luxury
items such as shampoo, conditioner, deodorant, lotion, even toothpaste.
Often times I wonder how we evolved to needing so many things to feel
our best day to day. Our ancestors didn't have zinc oxide or special
fragrances and they still thrived. How can we bring things back to
basics and be more thrifty at the same time? Lately I've been perusing
"naturalist" websites and blogs picking out the overly intensive ones
(ie. go milk your goat). So here are the trials and tribulations of my attempt at a more Humble approach to modern Luxuries.
The Deodorant Cream
A few days ago I was on Facebook ranting about the lack of deodorant for breasts. If you are a chesty woman you know that once summer hits the cleavage starts to offend. Don't pretend you haven't felt the sweat or caught a whiff of something funky. It's ok, your secret is safe with me. I've tried regular deodorant on that area before with disasters results, rash and pain you don't want to feel in that area. On Facebook my cousin linked a costly lotion deodorant and I got curious about how prevalent these cream deodorants are in the world. I found two websites with the same recipe. Angry Chicken and Hub Pages' Homemade Cream Deodorant.
So I went about finding all my ingredients. I only had to go two places, the local Walmart, and a natural food store. Walmart had the Cornstarch for $1.00, Baking Soda for $.52, Essential Oil for $1.89, Vitamin E for $4.44 and I got some eye droppers to dole out the oil for $1.49. So $9.34 plus applicable taxes. At the local natural food center i found Cocoa Butter for $8.30 and Shea Butter for $9.25 for a total spending of $26.89. Kinda steep I know. Hang in there with me. Using the quantities given it makes 4 oz of deodorant that will last 2-3 months, not accounting for if you freeze it or not, and you only used 1/4 of what you bought. So if it is too much to stomach go in on it with a friend and make a few batches so you can play around with scents too! So to my experiment....
The ingredients:

Everything you will need, minus the baking powder oops!
3 Tablespoons Cocoa Butter
2 Tablespoons Shea Butter - I accidentally put in 3
3 Tablespoons Baking Soda
2 Tablespoons Cornstarch
2 Vitamin E Capsules
16 drops of Essential Oils
First you want to combine all the non liquid ingredients, the Cocoa Butter, Shea butter, Baking Soda, and Cornstarch in your microwave safe bowl and nuke it for about 30 seconds at a time. I defiantly found that the difficulty of the cocoa butter was and issue i tried warming it alone just to get it out of the jar and then stabbing it with a spoon to break it up which helped when mixing everything together, it melted faster in little chunks.

Stab that Cocoa!

I found two jars I haven't known what to do with just sitting in my room.
Let everything set up in the fridge for an hour or so and check out how quick it melts at the human touch. It slides on just like a lotion and you can really put it anywhere. You know exactly what is in it so if you have allergies or sensitivities to anything you know if it will hurt or not.
I haven't found that the excess Shea Butter has hurt it much, it's probably a little softer and easier to melt but it will reset at room temperature. So far I am super happy.
Subscribe to:
Posts (Atom)